Namecheap Integration
Connect Namecheap to Domain Collective
Use this guide to connect Namecheap and sync your domains.
Prerequisites
Namecheap API access requires one of the following:
- 20+ active domains in your account
- $50+ spent in the past 2 years
- $50+ account balance
- Manual approval from Namecheap support
Approval typically takes 24–48 hours.
Video walkthrough
Get API credentials
Step 1: Request API access
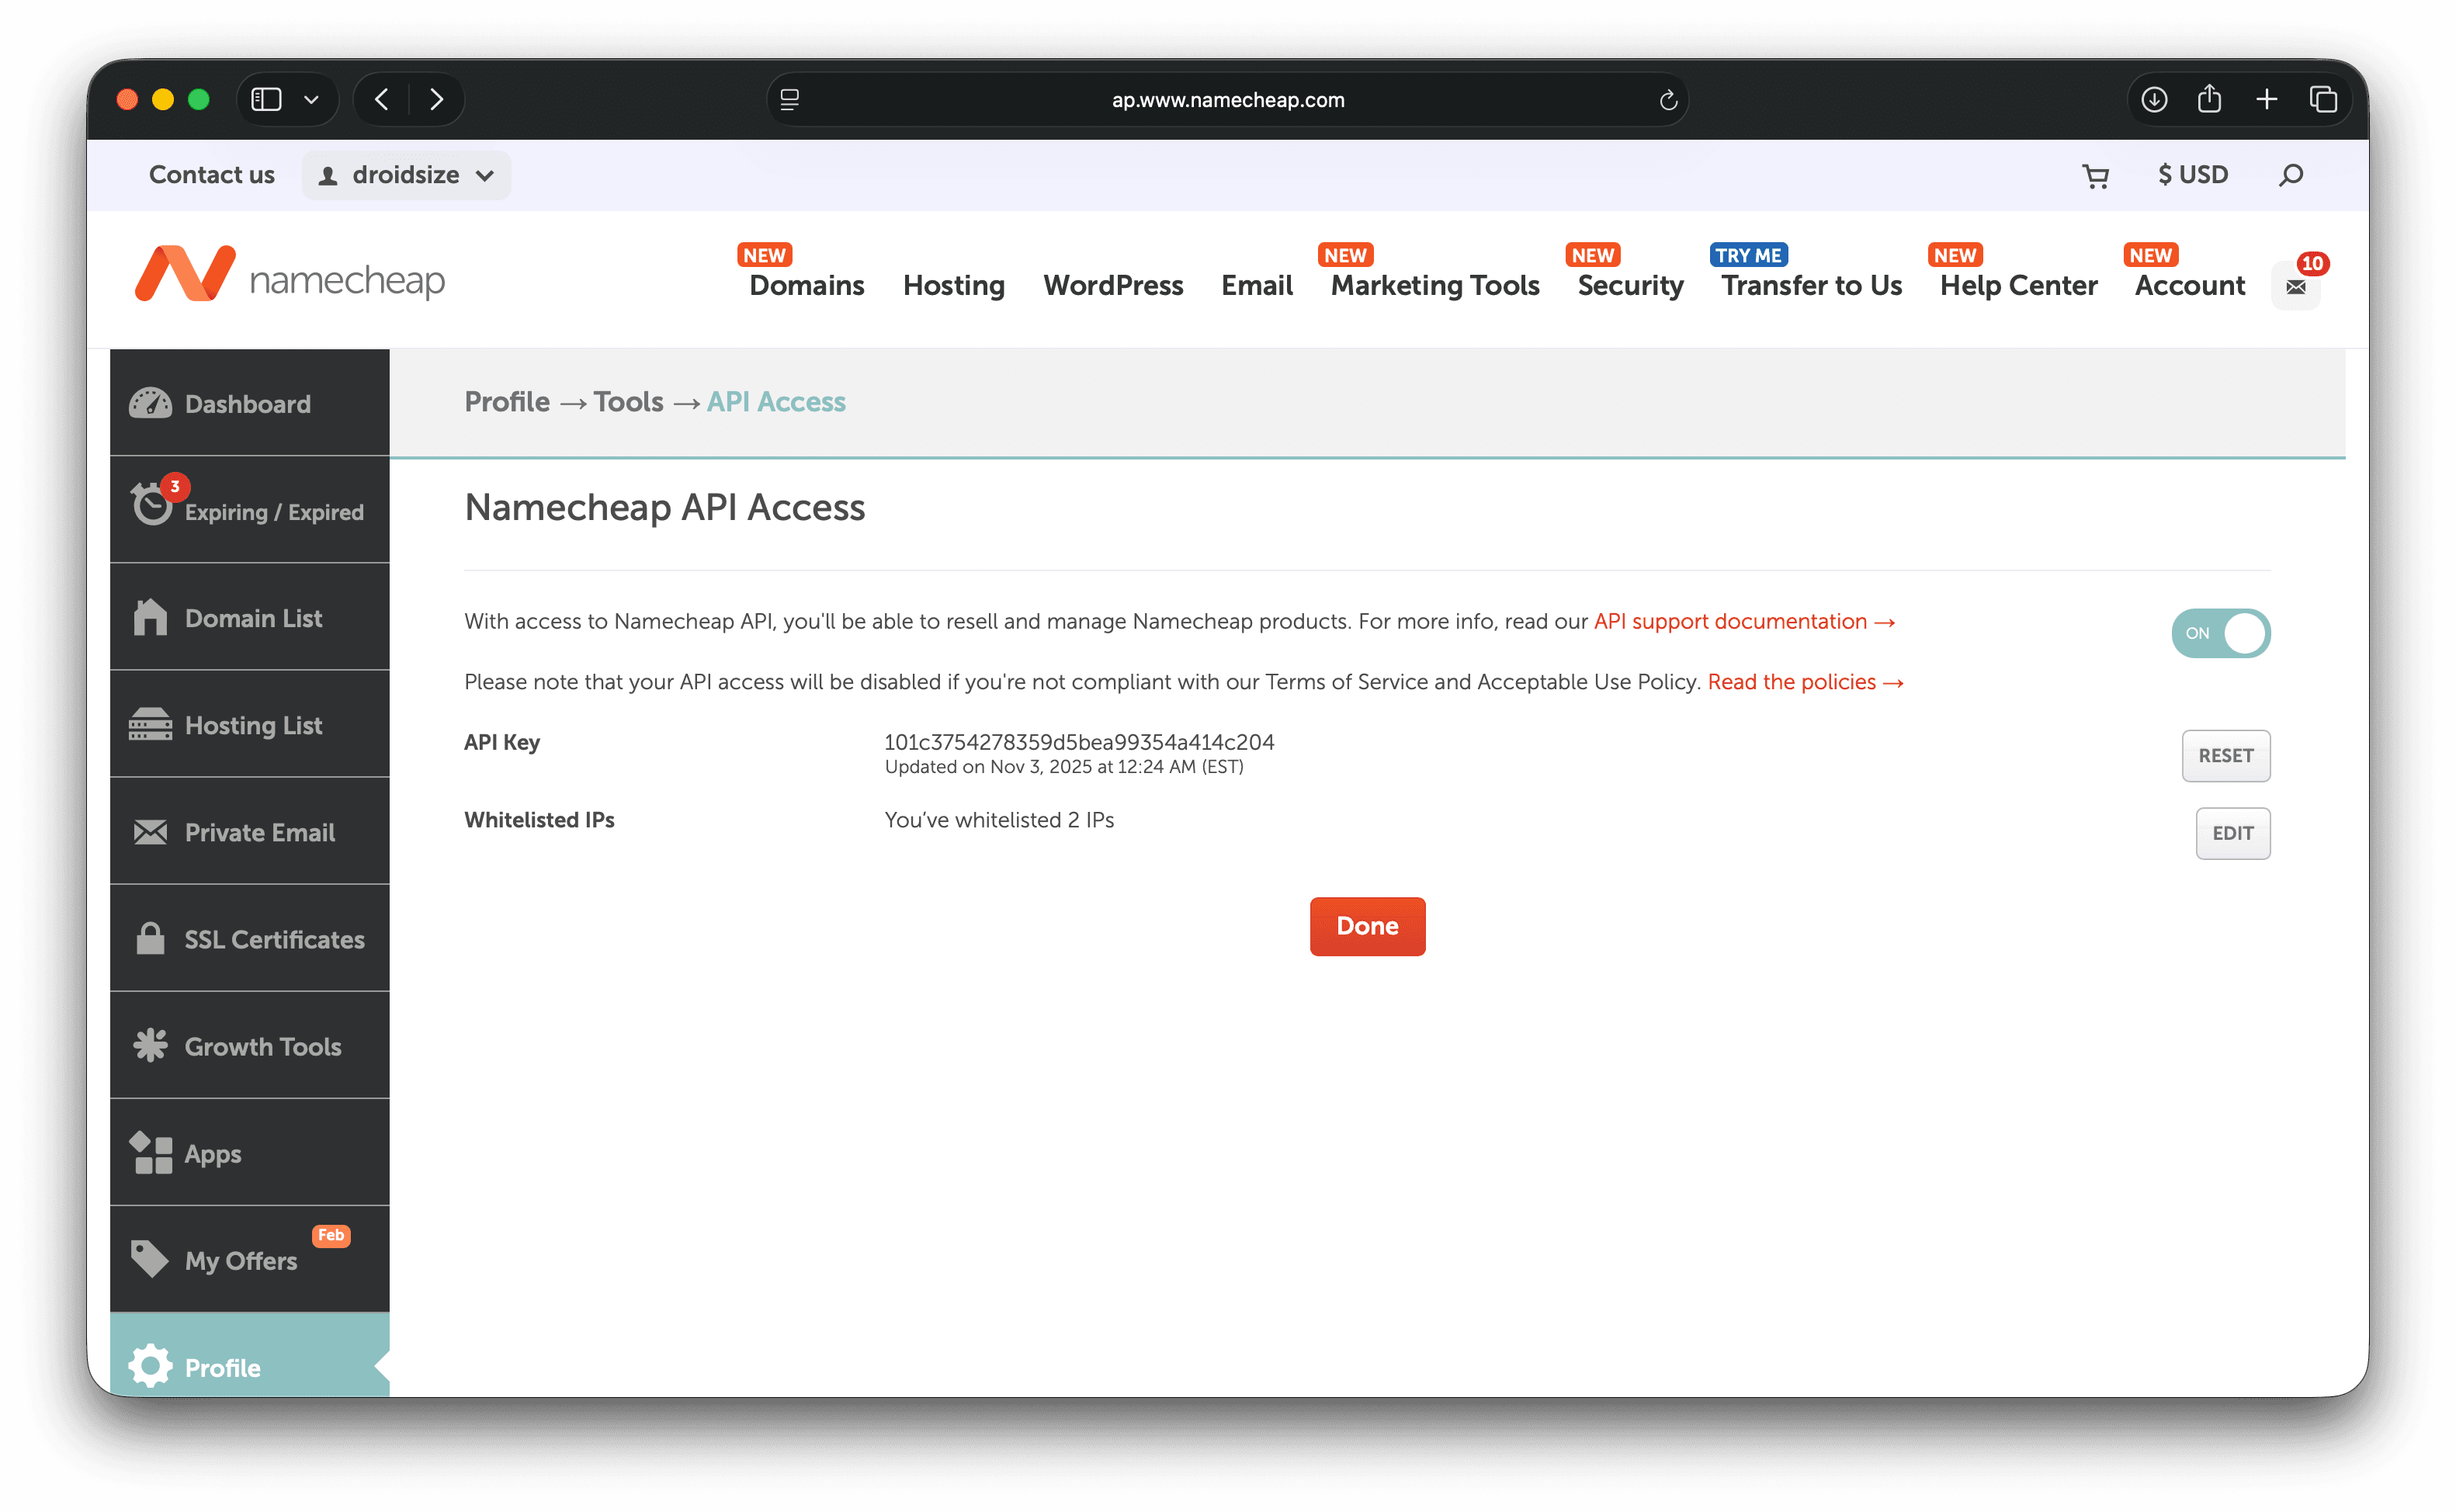
- Go to Profile → Tools → API Access.
- Request API access if it isn’t enabled yet.
- Wait for approval email.
Step 2: Enable API access
- Return to Profile → Tools → API Access.
- Toggle API Access to ON.
- Click Manage.
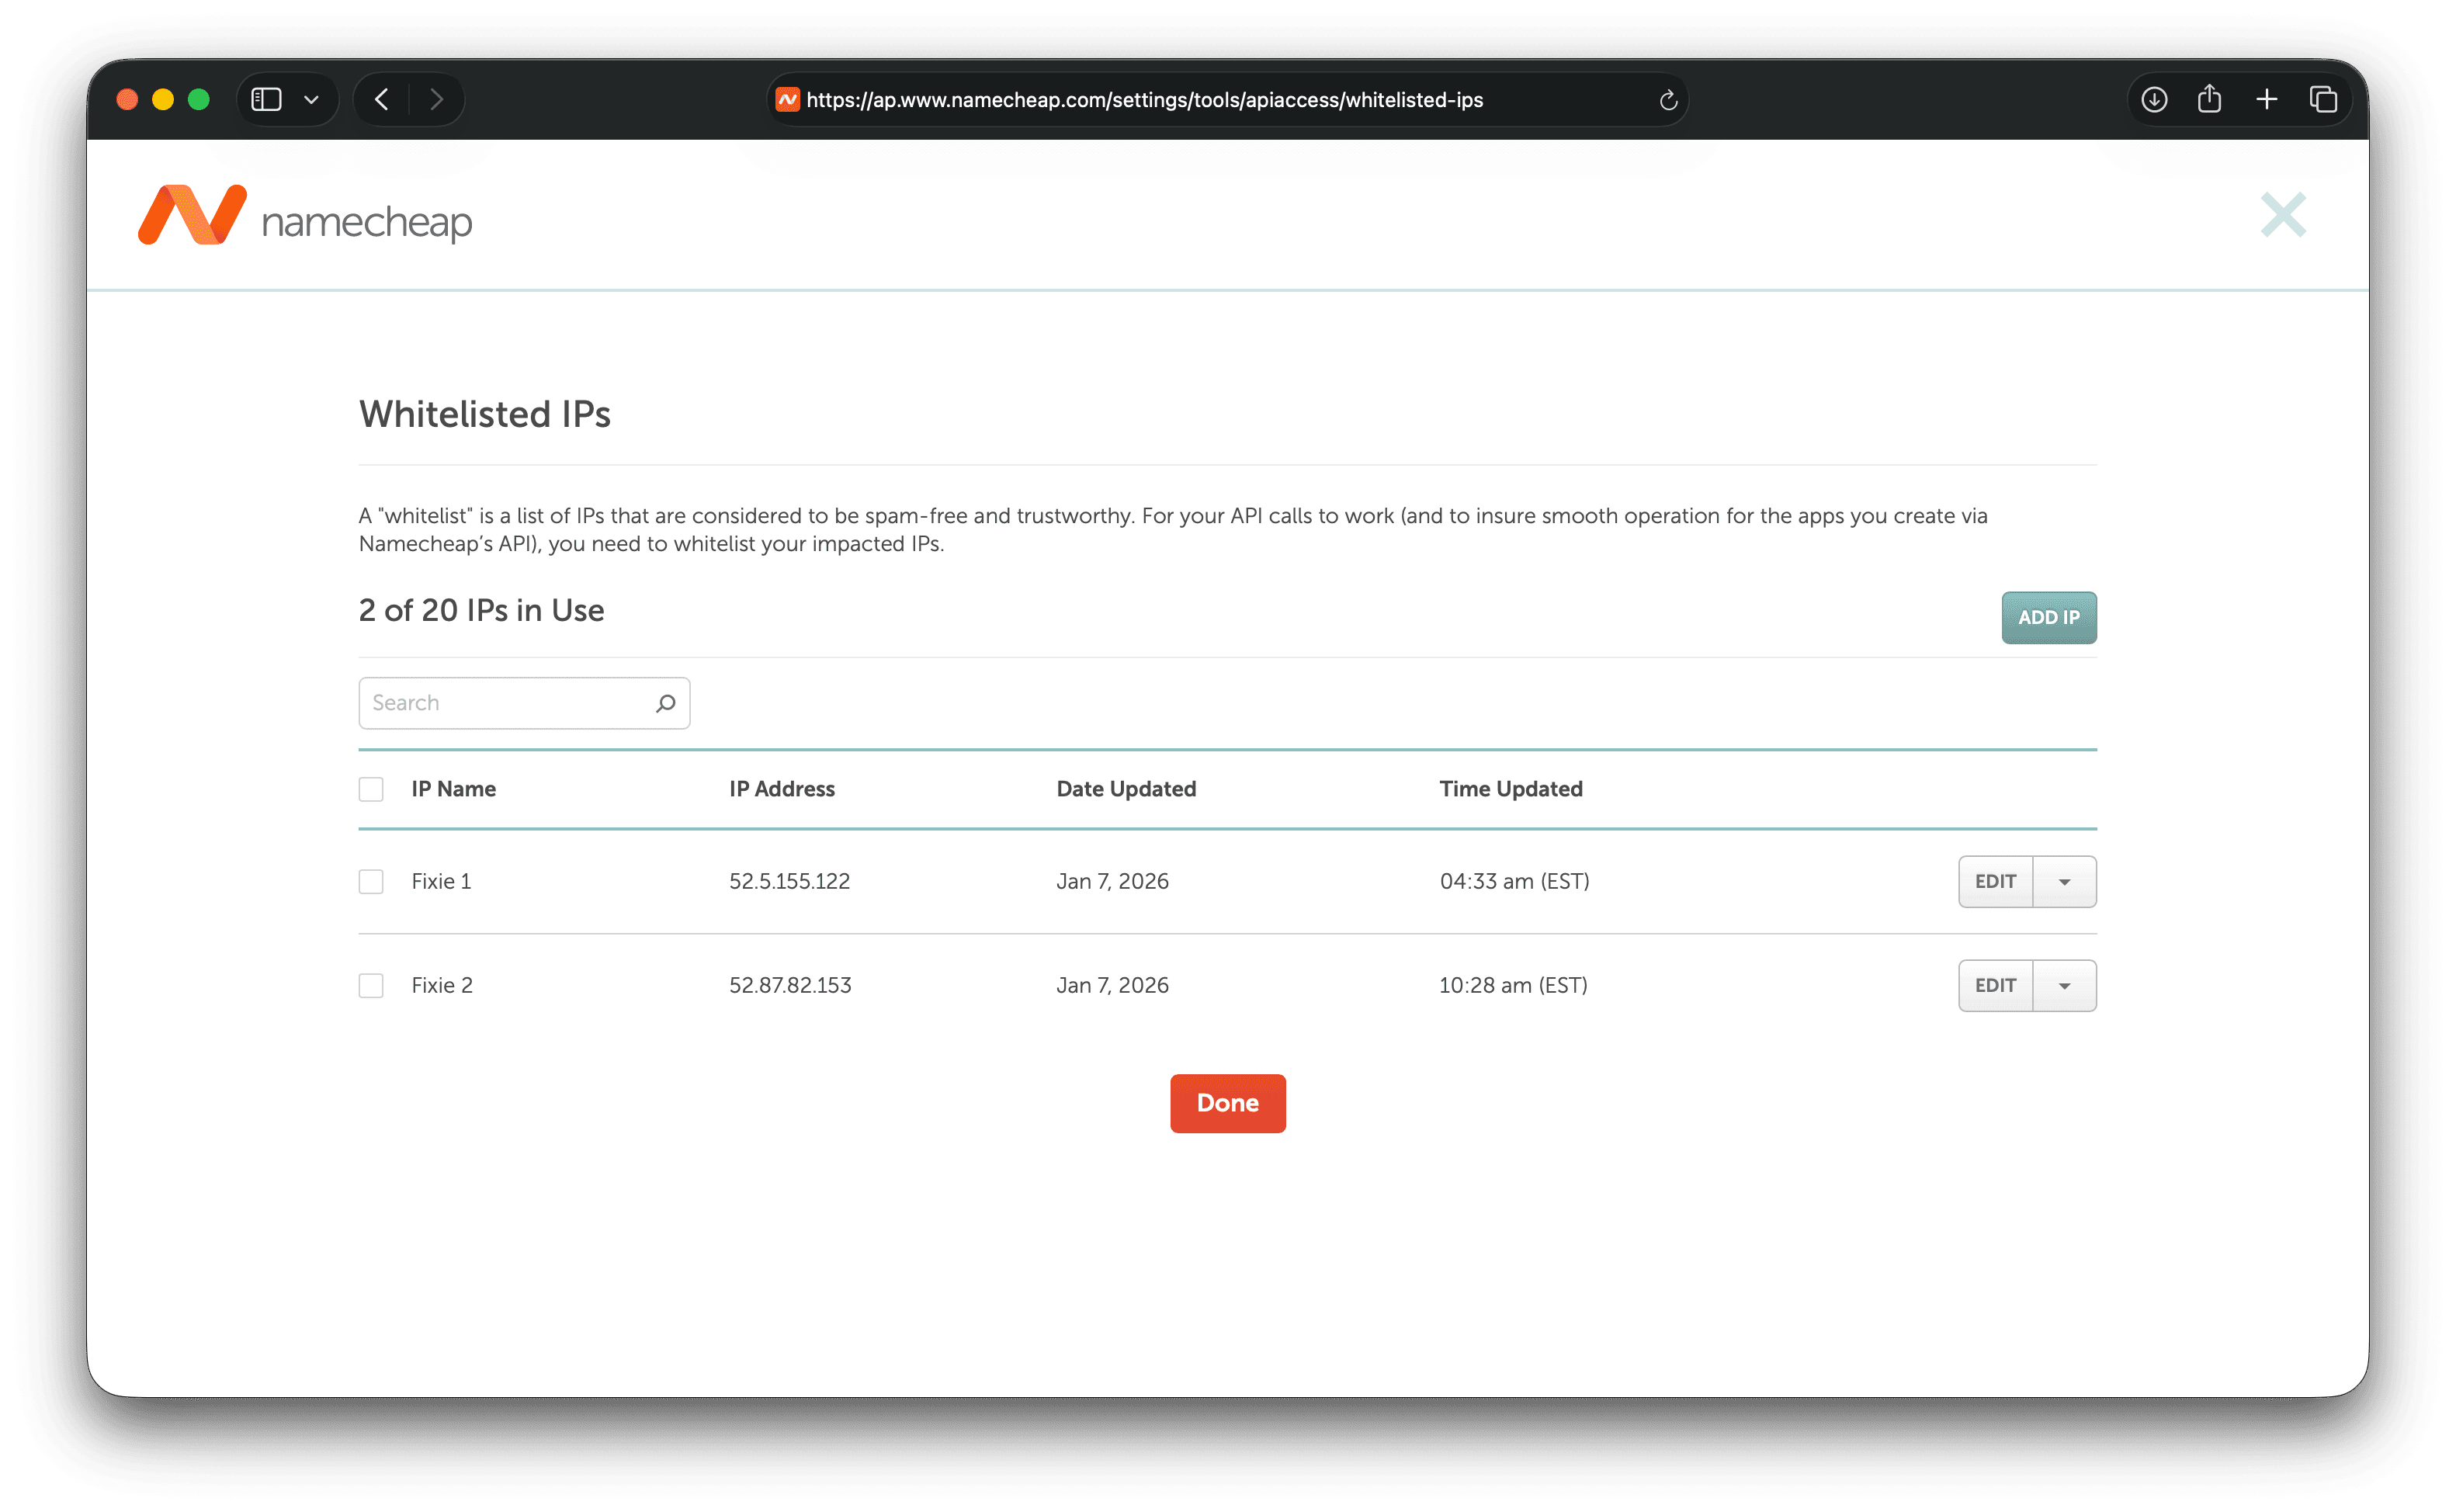
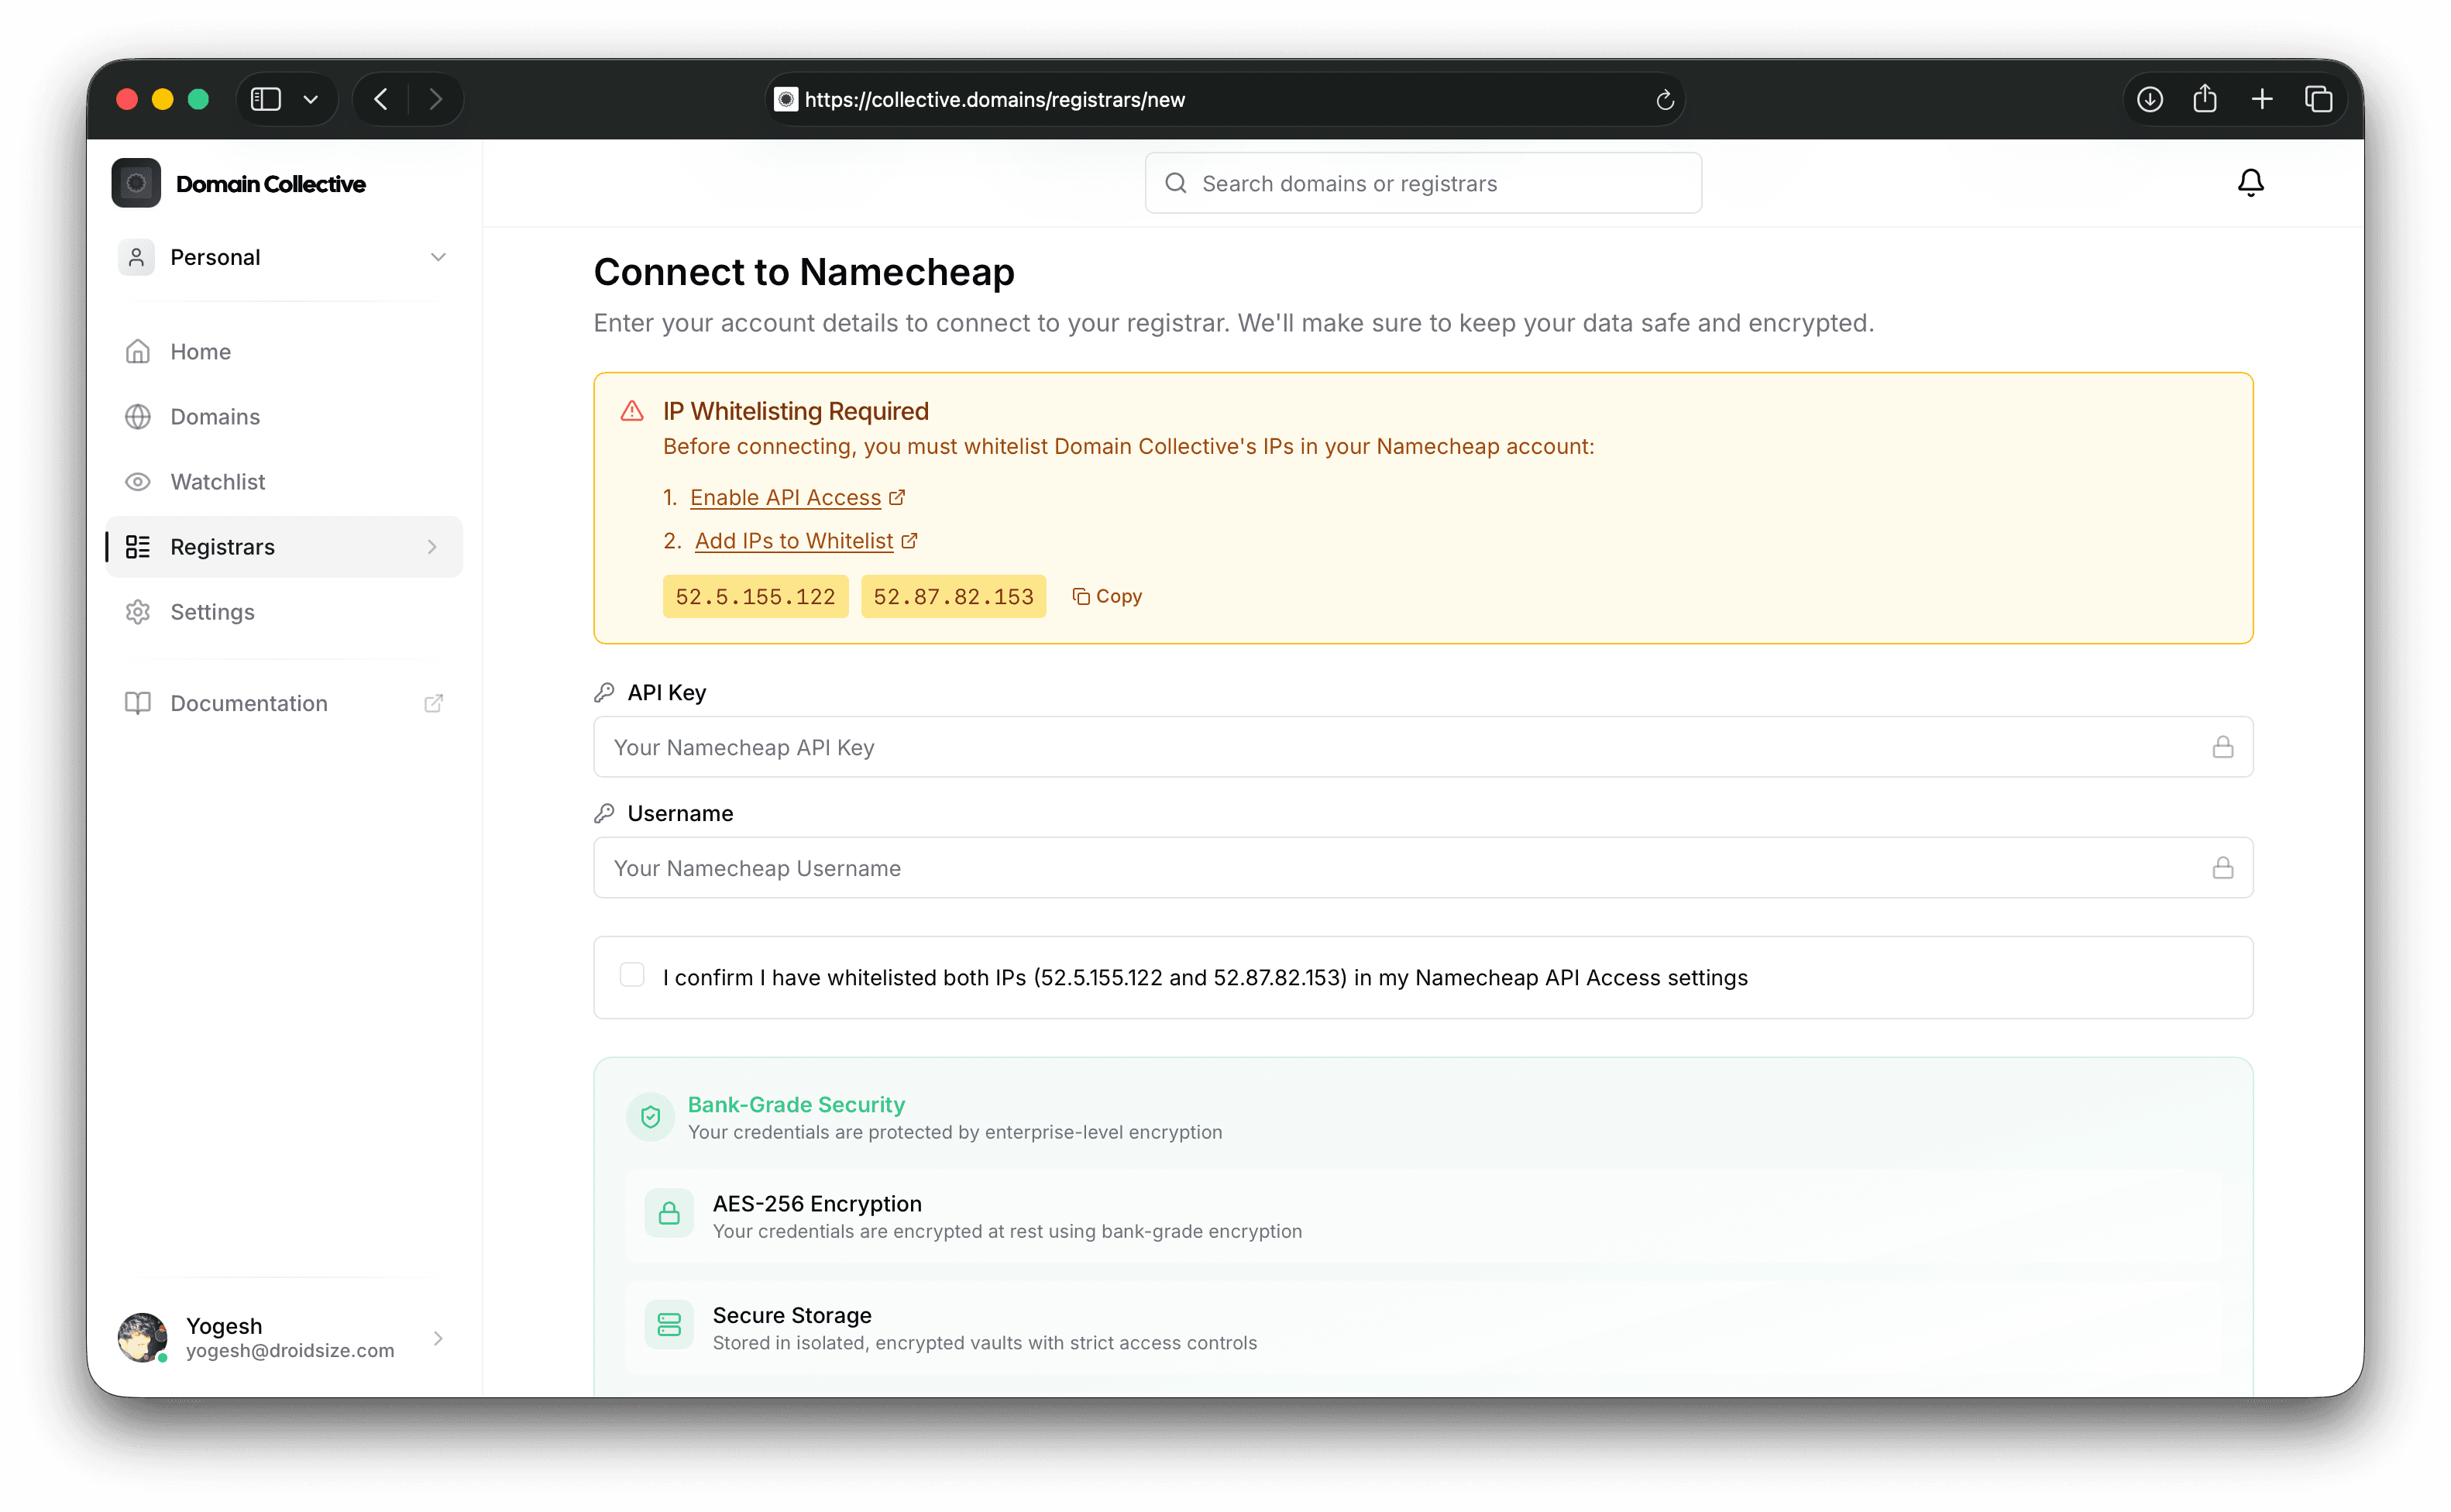
Step 3: Whitelist Domain Collective IPs
Namecheap requires IP allowlisting. Add both IPs below:
-
52.5.155.132 -
52.87.82.133
Step 4: Gather credentials
You’ll need:
- API Key (shown on the API Access page)
- Username (your Namecheap username)
Connect to Domain Collective
Enter your API key and username in the integration form.
Troubleshooting
- API key required: IPs are not whitelisted.
- Invalid API key: Check the API key + username pair.
- No domains returned: API access may still be pending.
References
Last verified: February 2026